Tuesday, December 23, 2014

Right Stay

I started on the rear triangle on Sunday!.  My strategy is to get the right side just where I want it, then I can put a wheel/rear triangle t-square in it to properly align the left chainstay.  I'm mostly going at it this way because my homemade jig doesn't keep the dropouts lined up perfectly, and the extra steps let me tweak it on the fly.


The dropout went on easily.  I used some more of the 50N silver; I think I'm starting to get a better feel for it.  It certainly seemed to jump when I wanted it to.

I pinned the bottom bracket in the jig using the square profile nails that Cycle Design sells, then brazed it freehand.


The one issue I noticed was that the pins wanted to draw the stay up just a little bit from how it fit in the Jig, so I used the sophisticated method pictured above the add a little weight to the end.


Here it is, brazed and soaked.  On this bike, I've left all of the bottom bracket miters a bit long., with the intention of grinding the inside smooth when I finish.  

As a bonus, here's a picture of my cable routing:


Crossing the cable from the right shifter to the left side of the down-tube (and the left to the right) keeps the housing from having sharp bends, but looks a little odd since the cables must cross back under the down tube.  I spent a little time with some stainless tubing to solve that.  It's silly, it's overkill, but I like it.  This way the correct cable goes to the correct shifter, but the cross happens out of sight so the cables will stay roughly parallel to the down tube.  As it turns out, this stainless steel ball of spaghetti creates very little friction.

For the curious, here's the great Sheldon Brown's take on crossing the cables.  To keep things balanced, here is an opposing viewpoint.

Also worth noting, I've drilled the bottom bracket for drainage.  Almost all water related damage that I've seen or heard of on a bike was the result of standing water, not just exposure.  Hell, I've been riding my first build, sans-paint, in the rain on and off, for years and the rust hasn't made any real progress.  Since I can't totally seal this area (there's always the potential for a little water to sneak in through the seat tube), I wanted there to be a good way for it to drain.


Tuesday, December 16, 2014

Jig Interlude

This is a quick one, but there'll be more this weekend.


Here's my home made jig.  I've got the front triangle (already brazed) clamped in it.  I'm using my incredibly intricate chain-stay angle/length tool to set it up for brazing on the chainstays.  I use a digital angle gauge while I jostle it around to find the point where the angles match up with my rattlecad diagram.  

Two quick points: 

1) This works way better with a rigid piece of metal.

2) Referencing off of the head tube instead of the seat tube should yield better results (with a little math).  If the seat tube is forward or back a half degree, you'll most likely be able to account for it with the fore-aft position of your saddle.  If the relative angle of your head tube and chainstays is off, your bottom bracket height will change as will some of the steering characteristics.

Cheers, have a good week.

HIGH TECH!

Thursday, December 11, 2014

Fork, Part 2

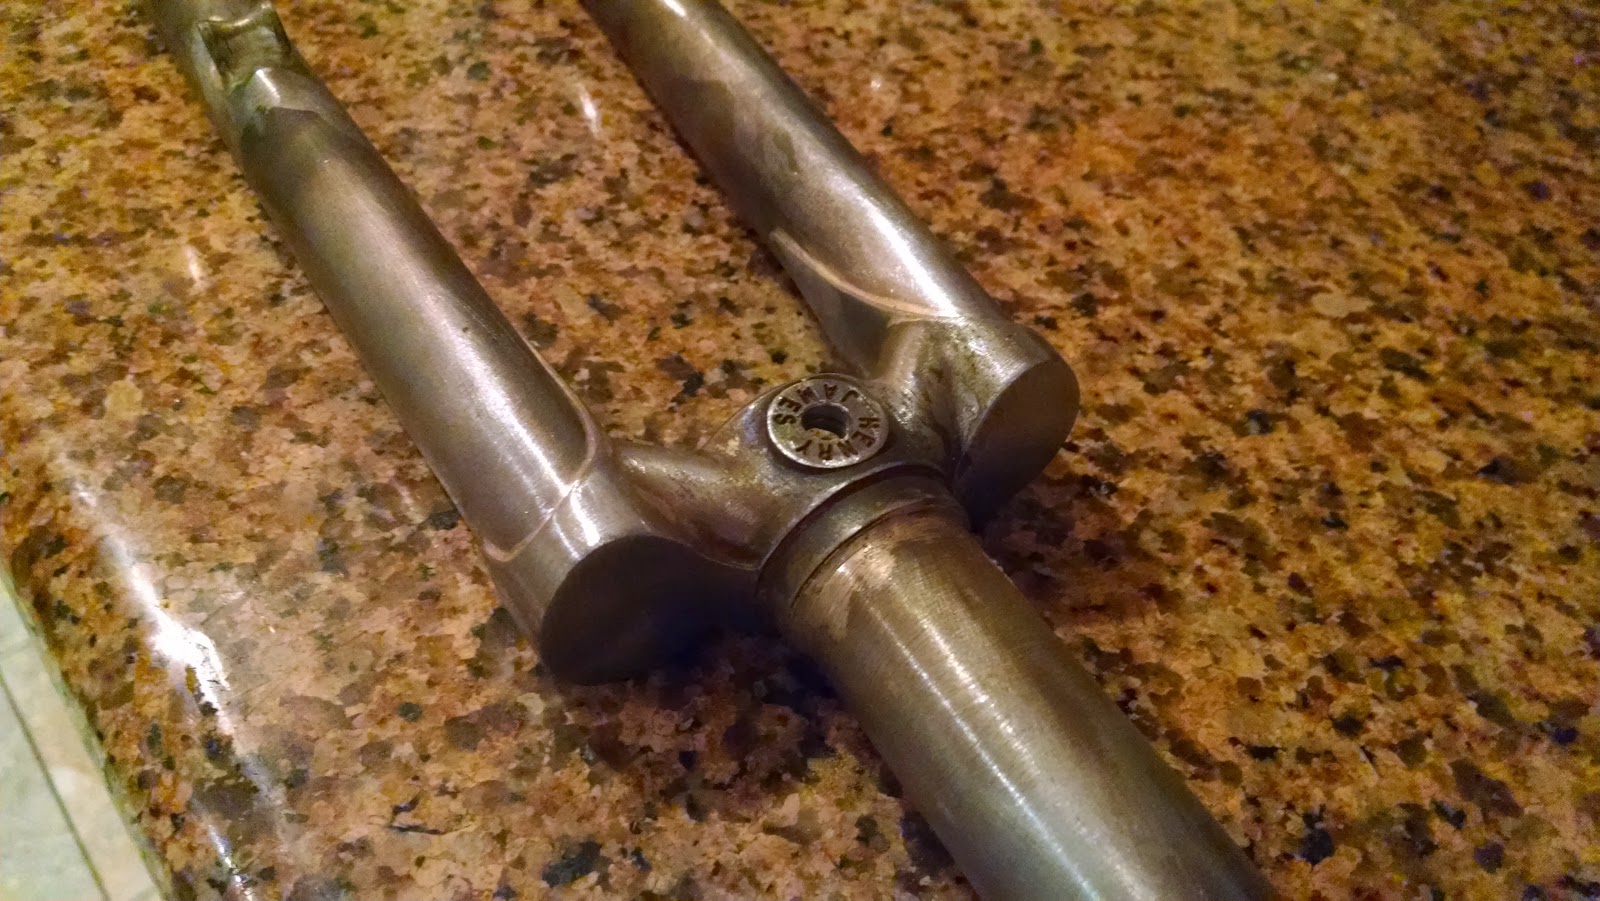
Had some time to work on the fork this week.  The fit up on the crown was a bit on the gappy side, so I went with 50N silver instead of my customary 56%.    

56% flows faster, melts at a slightly lower temperature, and I just generally love working with it.  

50N is a bit thicker, and a bit more sluggish.  It has a few advantages: it will fill larger gaps, it will form small fillets for strong joints on brake bridges/other high stress braze-ons, and I'm told that it wets out more easily on stainless steel than some other silver alloys.

The downside is that I just haven't gotten the hours in with it to feel totally confident when it's necessary.  I ended up doing a second pass to make sure I had good penetration, and definitely crisped some flux near the end (should have let it cool down and re-fluxed it instead of heating it right back up).


That said, I think I'm going to stick with this one.  I was able to draw the silver through to the pins, and I think it's unlikely that I have a bad fill.


Here's the crown all cleaned up.  I love Henry James' crowns, they have this beautiful elegance to them.  I can't wait to see it with some paint on it.


I also love hourglass spindles.  I set these up to work with Nitto/Rivendell's Hub Area Rack.  It's a gorgeous piece of gear.  I can't imagine actually needing four bags for the kind of riding that I do... but WHAT IF? 

Worth mentioning: I used 50N for these rack mounts too.  Note the nice little fillet around the base of each of them.  


Here's the whole thing.  It needed a bit of a twist, but I've gotten it pretty straight. 


Bonus image: my co-blogger, Gimble.  She gets her own chair.