Showing posts with label brazing. Show all posts

Thursday, December 11, 2014

Fork, Part 2

Had some time to work on the fork this week.  The fit up on the crown was a bit on the gappy side, so I went with 50N silver instead of my customary 56%.    

56% flows faster, melts at a slightly lower temperature, and I just generally love working with it.  

50N is a bit thicker, and a bit more sluggish.  It has a few advantages: it will fill larger gaps, it will form small fillets for strong joints on brake bridges/other high stress braze-ons, and I'm told that it wets out more easily on stainless steel than some other silver alloys.

The downside is that I just haven't gotten the hours in with it to feel totally confident when it's necessary.  I ended up doing a second pass to make sure I had good penetration, and definitely crisped some flux near the end (should have let it cool down and re-fluxed it instead of heating it right back up).


That said, I think I'm going to stick with this one.  I was able to draw the silver through to the pins, and I think it's unlikely that I have a bad fill.
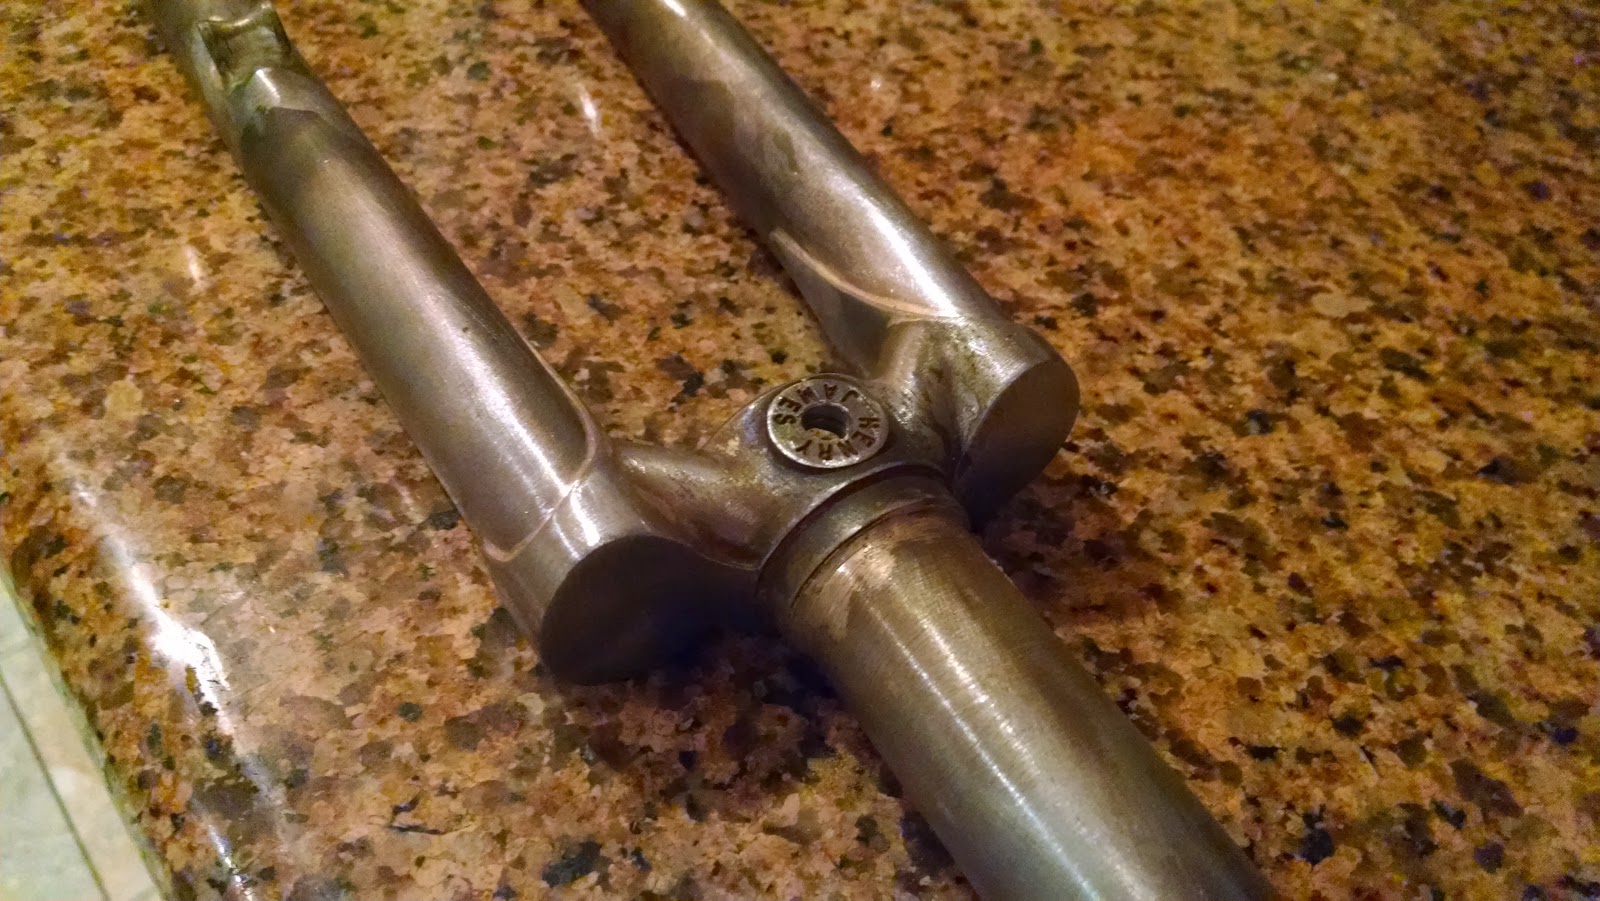

Here's the crown all cleaned up.  I love Henry James' crowns, they have this beautiful elegance to them.  I can't wait to see it with some paint on it.


I also love hourglass spindles.  I set these up to work with Nitto/Rivendell's Hub Area Rack.  It's a gorgeous piece of gear.  I can't imagine actually needing four bags for the kind of riding that I do... but WHAT IF? 

Worth mentioning: I used 50N for these rack mounts too.  Note the nice little fillet around the base of each of them.  


Here's the whole thing.  It needed a bit of a twist, but I've gotten it pretty straight. 


Bonus image: my co-blogger, Gimble.  She gets her own chair.


Saturday, November 22, 2014

Fork, Part 1

It's been a loooooong time.

Over the last couple of years, I finished the bike I was working on, made a sweet single speed, and rode them both a bunch.  I made a lot of progress with my brazing, but still count as a dangerous amateur.  

I've done a few practice forks, and I think this one will turn out well enough to bomb down big hills on.


First, I trimmed the fork down to the right diameter to fit the Llewellyn dropouts that I'm using.  Then I used my home-made blade bender to add a nice smooth bend.  The block was made for me by a coworker out of some scrap wood at his other job repairing boats.

I'm using 1.0/.66 True Temper blades.  As a Dangerous Amateur (tm), I really like these.  They bend easily and are pretty forgiving when I have to mess with them.  The folks at Henry James are always a pleasure to work with, and if I mess up I can get replacements pretty quickly.


48.5 mm rake on both blades, perfect!  The bends are also pretty close to perfectly in-plane.  Next step, fire!


For this bike, I have my own brazing setup.  It's oxy/propane, and the oxygen is drawn from the air by a medical oxygen concentration.  This way I don't have to deal with oxygen tanks or acetylene, and the slightly more diffuse flame that the propane makes actually feels a lot more natural for silver brazing.


I started by attaching the fork crown to the steerer tube.  I've gotten a lot more patient with practice and have stopped burning much flux.  I pulled through some excess silver, but a swipe or two with a stainless steel brush  while it was still hot got rid of most of it.  The rest should come off in a few minutes with emery cloth.


I didn't have time to start brazing the dropouts onto the fork, but I did spend a little time adjusting the jig.  I bought it from someone who'd already adapted it to accept an anvil axle, and with a few extra measurements, it turns out pretty awesome results.


Ok, it's been a while since I've written an entry, so I'm out of practice.  Please accept this blurry picture of a puppy I want to adopt as a show of contrition.

Saturday, June 30, 2012

Making Stays

The seat stays connect the dropouts for the rear wheel to the junction of the seat and top tubes.  On the dropout end, I attach a cap that slots into the rest of the dropout.  The inside of the cap has some curves to it, so I started by filing the stay to match.  I used calipers to determine the maximum distance that it could sink in, then measured that on the stay each time I made an adjustment.


Now, since the cap doesn't have a second open end, I had to do things a little differently to see if I'd filled everything properly.  If I were a pro, a blind braze like this wouldn't make me blink, but I'm still a bit paranoid.  On the suggestion of the internet, I curled up a little plug of silver, coated it in flux, and dropped it in the cap.  Then I added the stay and heated the whole end until the silver melted and was sucked up into the joint by capillary action.


For the other end, I wanted to make an abrupt but rounded cap.  I've already done this, so it didn't hold a lot of surprises.  It was a bit harder than last time because I spaced on drilling vent holes before brazing the end up.  That leaves heated air trying to push the filler out.  It worked out alright, but I'll be more careful next time.  I used brass so that the filler wouldn't melt when I braze them to the sides of the seat lug.

Also note that I notched the lug itself to increase the surface area that will hold things together.


The dropout caps go on the chainstays in about the same way as they go on the seat stays, but you have to line them up so that they're in the same plane as the oval in the stay.

Sunday, April 1, 2012

Jigs and Silver

Jig

I put together my Half-A-Jig (tm) today.  I'm using one piece of extruded aluminum from 80/20 and a couple of v-blocks designed for drilling tubes.  One v-block is cut down to accommodate the lugs on the head tube, the points of which would otherwise keep the tube from lying flat.


The idea here is to help me align the head tube and seat tube so that they stay in plane, without spending $400 bucks and weeks on the materials to make a full jig.  Basically, I wanted a bit flat metal bar, but I didn't want to deal with the issues involved in clamping a round tube to said bar.  I had assumed that, in the process of getting it set up to work with the specific dimensions of my bike, I would have to shim things to get everything flat.  


I was pleasantly surprised to find that the two tubes ended up perfectly in plane!  I had a bit of wavering, but it was between exactly level and .1 degrees off... I think I'll live.  I may add some simple pipe clamps to hold things down so that I can tilt the whole structure to make tacking easier. 

First Silver Lug


I've decided to try my hand at doing lugs with silver.  Silver melts at a lower temperature and has a bit more surface tension and a lower viscosity when melted.  For these reasons, it can be a bit easier to work with than brass.

A practice joint mitered, lugged, fluxed, and ready to go!

Results: I burned some flux.  Having worked with brass mostly before, this isn't super-surprising.  Temperatures that would be fine with brass are way outside of the range that I should have the metal while working with silver.  I need to train myself to keep the flame back and moving more.  If I can spread the heat out more instead of focusing so much, I should be able to draw things through better.


When I cut it open, I found that things were fairly well filled in most places, but still had some voids that I wouldn't want in a finished product.  I'm going to do some more practice with random pieces of tubing and see if I can get past that point before I use the rest of my practice lugs.