If you haven't read it yet, here's We Need Those Stinkin' Badges, Part 1.
I made one more badge at a slightly smaller size a few days ago. Today I decided to get it finished and ready to attach to the bike. I started by trimming the excess off carefully with the band saw and this giant sanding disk. Then I lightly sanded the raised bits with a fine grit sand paper. That really set off a nice contrast between the higher and lower sections.
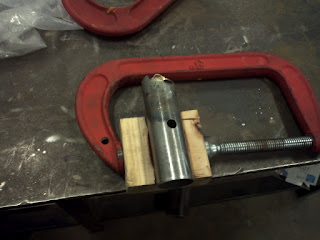
The next step was to curve the metal to fit the front of the head tube. One of the guys at Techshop was nice enough to cut a half-cylinder out of a piece of wood for me with the same radius as the tube (I haven't gotten checked out on the wood shop machines yet). I initially tried hammering the plate directly into the wood form with a mallet... but I couldn't get the angles right with the mallet I had. For my second attempt, I sandwiched the sheet between the form and a scrap piece of head tube and then squeezed them all in a vice. It worked... and also cracked the form down the middle.
I encased the badge in a layer of rubber that someone happened to be messing with, to prevent corosion until I could clear-coat it... and then immediately found out that there was clearcoat up for grabs. So, I cut it out and used that.
Here it is finished!
More Brazing

I also did a test-braze today. It turned out messy. As usual, I had issues flowing filler over the top of the lug, but I got most of it underneath. When I cut the joint open, it looked like it was pretty well filled with one small gap. I think it could have been used on a frame without much danger, which is reassuring.


So far I've gotten a lot of good feedback on this badge. It looks even nicer in person. I don't think I'm going to bother inking the etched parts.
ReplyDeleteExtremely good work, here! Nice blog! :D
ReplyDeleteThanks!
ReplyDelete